Let's say we're making a fruit related app, as a nod to that fruit company in Cupertino that we've been hearing so much about. The app is simple: The user selects a type of fruit, and that's it. We have the following enum with supported types of fruit:
enum Fruit {
    case apple
    case banana
    case mango
    case orange
    case pear
}
We are writing our user interface in SwiftUI and we want to use a Picker in a Form, like in this image, for the fruit type selection:
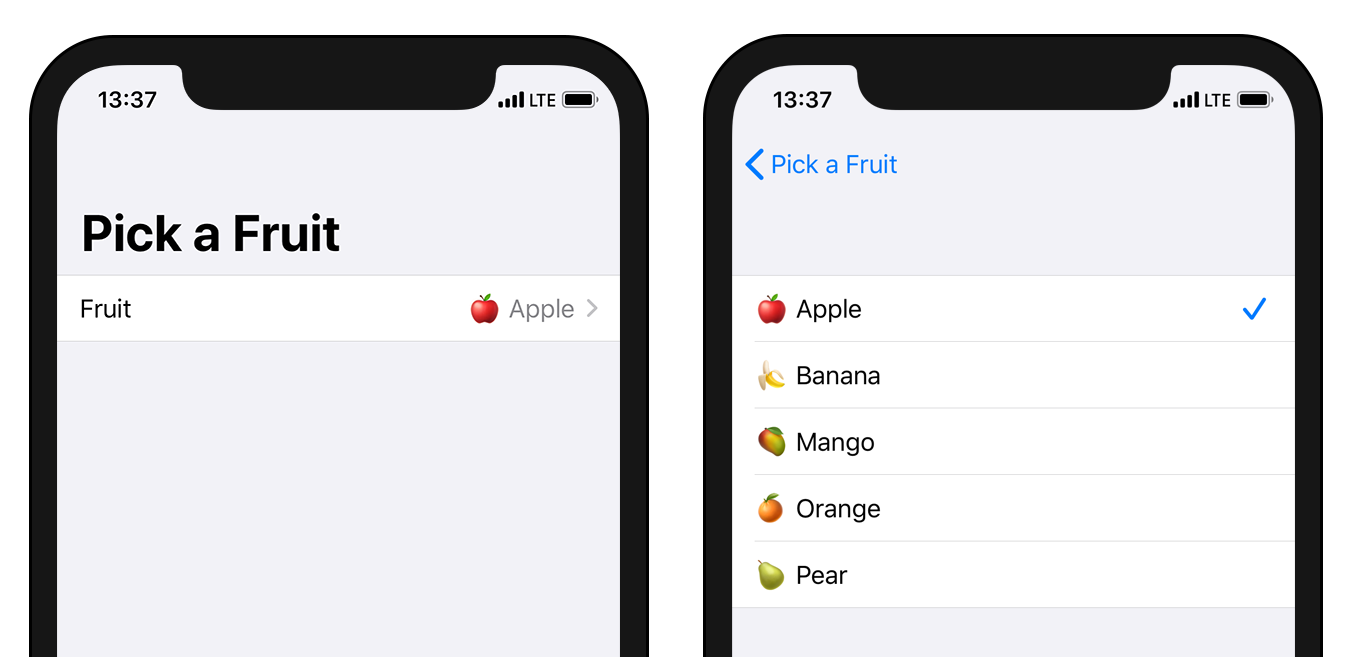
It's actually not that difficult. We could use a regular Picker view and write some code for mapping the Picker options to the enum. But what if we want another enum for selecting, I don't know, vegetables? Then we'd have to write that same code all over again, which would be boring. Wouldn't it be nice if we could repeat a little bit less code? Let's say yes or the rest of this text is going to be rather awkward.
Picker View for Enum Values
OK, so let's do it. We will make a special reusable picker view for picking enum values, and we will name it... EnumPicker. And they say naming is hard. Easy-peasy.
Ideally, we would be able to use the EnumPicker in the following manner, where the picker options are derived from the enum type of the state property.
struct ContentView: View {

    @State var selectedFruit: Fruit = .apple

    var body: some View {
        NavigationView {
            Form {
                EnumPicker("Fruit", selection: $selectedFruit)
            }.navigationBarTitle("Pick a Fruit")
        }
    }
}
Pickable Protocols
Before we get to the actual view, we're going to need to make our enum a little bit more capable. Or Pickable rather. We need the enum to be:
CaseIterableIdentifiableHashableCustomStringConvertible
It would be a drag to have to write those 4 protocol names every time, so let's combine them into the typealias Pickable, like so:
typealias Pickable = CaseIterable
                    & Identifiable
                    & Hashable
                    & CustomStringConvertible
Sure, there are other ways to indent this type of code, but this is one of those fancy responsive web pages that could potentially get really narrow, so let's try to not use too many columns, lest the reader may have to scroll sideways.
Pickable Conformance
Anyway, next step. Let's make our enum Pickable by way of extension. The CaseIterable and Hashable protocols will be handled by the compiler, so they don't require any extra code. For Identifiable we need to add an id property and for CustomStringConvertible we need a description. The id is just going to return the enum value itself. The description will return the string that will be displayed in the EnumPicker for each fruit.
extension Fruit: Pickable {

    var id: Self { self }

    var description: String {
        switch self {
        case .apple: return "🍎 Apple"
        case .banana: return "🍌 Banana"
        case .mango: return "🥭 Mango"
        case .orange: return "🍊 Orange"
        case .pear: return "🍐 Pear"
        }
    }
}
The name Pickable works especially well for a fruit enum capability, don't you think? I always promote PDD, Pun-Driven Development, whenever possible. No matter how weak the pun is.
Implementing The View
The implementation is straightforward. The idea is that our EnumPicker view will wrap a regular SwiftUI Picker view, but we prepopulate it with the options from the enum.
The EnumPicker view is a View conforming struct. It has a placeholder type Enum that conforms to the Pickable protocol, and represents the particular enum we want to populate our picker with.
It also has a placeholder type Label. It's the same as the corresponding Label placeholder type of the built-in Picker view. It's typically a Text view containing the title of the picker field. We will just forward it to the wrapped picker view.
Our body property builds the Picker by iterating over the enum cases and adding a Text view with the description of each case.
struct EnumPicker<Enum: Pickable, Label: View>: View {

    private let label: Label

    @Binding private var selection: Enum

    var body: some View {
        Picker(selection: $selection, label: label) {
            ForEach(Array(Enum.allCases)) { value in
                Text(value.description).tag(value)
            }
        }
    }

    init(selection: Binding<Enum>, label: Label) {
        self.label = label
        _selection = selection
    }
}
Wait, what? What do you mean
_selection? What's that underscore doing there? Well, we can't assign toselectionbecause then we would be trying to assign the bound value and not the binding itself. When we use_selectionit means that we are assigning the actual binding property wrapper object.
Initializers
The initializer takes a selection binding, as well as the label, as input, just like the regular Picker, but it creates the option views itself, so unlike the regular Picker our initializer doesn't need a content view builder closure.
The regular picker has a couple of other initializers for the case where all we want for the label is a plain Text view. These initializers take a string or a localization string key as input instead of the label. We will replicate those initializers in our view as well, once again omitting the content view builder closure.
extension EnumPicker where Label == Text {

    init(_ titleKey: LocalizedStringKey, selection: Binding<Enum>) {
        label = Text(titleKey)
        _selection = selection
    }

    init<S: StringProtocol>(_ title: S, selection: Binding<Enum>) {
        label = Text(title)
        _selection = selection
    }
}
Conclusion
We have now reached our goal and can use the EnumPicker to pick our fruit type, and also easily reuse it with other enums in the future. Yay 🎉 I know, right?
struct ContentView: View {

    @State var selectedFruit: Fruit = .apple

    var body: some View {
        NavigationView {
            Form {
                EnumPicker("Fruit", selection: $selectedFruit)
            }.navigationBarTitle("Pick a Fruit")
        }.navigationViewStyle(StackNavigationViewStyle())
    }
}
Whoa, hold on, why are we setting the navigation view style though? Well, there's a bug in SwiftUI in iOS 13.5, and some of the earlier versions, where the layout will jump if this style is not set explicitly. 🤦♂️
Bonus: Picker Style
If we want a different picker style, such as a segmented picker, then we can use the .pickerStyle(...) modifier, just like with the regular Picker:
EnumPicker("Fruit", selection: $selectedFruit)
    .pickerStyle(SegmentedPickerStyle())
